I think this is my favorite Accessible AI article to write so far. I have had a lot of struggles with getting vLLM working with Intel Arc GPUs. I didn't give up on it though as Intel has some very interesting hardware which I find to be pretty competitive for the price when it comes to LLM inferencing.
Background
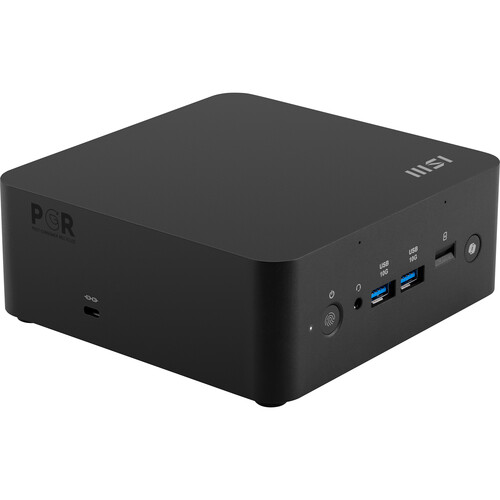
I bought an MSI Cubi NUC AI+ 2MG a few weeks ago with intention of having it be a general purpose LLM appliance helping out with things like being a tool-calling agent, search tool, writing assistant and a dictionary. (Haha, yes I use LLMs as dictionaries) Another stretch goal is to serve a vision language model (VLM) I have been fine-tuning for several months towards the end of 2025.
These Lunar Lake-based NUCs are really hard to find. I was very interested with the MSI Cubi NUC AI+ 2MG after watching Level1Techs review video on it. If you use the affiliate link, you probably won't be able to find one. After a bit of digging, I was able to find one at BH Photo for $899. I am so glad that the RAM shortage has not affected the price of this NUC in a very significant manner.
On paper, this mini PC is awesome. It has an Intel Core Ultra 7 258V Lunar Lake-based CPU and 32 GB of really fast LPDDR5X-8533 MT/s RAM soldered onboard. What's also intriguing is the Arc 140V GPU based on the newest GPU architecture, Battlemage. Think of the one that the Lunar Lake provides is an integrated version of the Arc B580. The Arc 140V is one of the best integrated GPUs on the market for both gaming and AI.
But let's just focus on the AI. The Arc 140V gives us 64 TOPS (INT8) of performance. That's pretty substantial and as you will see later on with LLMs, can get you anywhere between 11-30 tokens/s depending on model architecture, its size and quantization.
Get Ready for some Battlemage Action!
In this post, let's learn how to leverage the Xe2 Battlemage GPU architecture with vLLM and set up a device that will perform very well with smaller LLMs for utility that you'll forget that you're running it off a mini PC 😁 Or, if you decide to, invest in some B580s and run a pretty fast inference server to do some heavy text generation!
Why vLLM? Why not llama.cpp?
llama.cpp is easier to run and setup on this hardware. Installing for Intel XPU backend is really hard in my opinion. I just don't think we are there yet. So you're going to be using the Vulkan backend if you run llama.cpp. I've set up llama.cpp many times on non-NVIDIA hardware.
There are also a few things that llama.cpp doesn't do as well as vLLM. One easy example is the ability to serve concurrent requests very quickly. vLLM is really good at this and is pretty much built to serve models in a production environment. There are a lot of low level optimizations too and knowing vLLM allows you to gain skills that relate to AI model deployment, serving and infrastructure.
I want to finish the year learning something new. That's another reason why I'm doing this!
Intel XPU
What is Intel xpu? The term xpu is the name that PyTorch/vLLM refer to ask Intel-based accelerators. Most of the time that will imply Intel GPUs. We can think of it as Intel's version of cuda for NVIDIA.
If you're into analogies, we can create this mental mapping:
| API | Vendor |
cuda | NVIDIA |
mps | Apple GPU (M-series) |
rocm | AMD |
xpu | Intel |
cpu | CPU |
Intel has a bunch of accelerators -- could be GPU, Gaudi, Xeon accelerator, etc. So makes sense why it's xpu, I guess. Haha.
Who is this guide for?
If you want to setup vLLM inference for Intel Arc GPUs such as Arc A770, B580, 140V, etc.
For the rest of this article I will be writing in tutorial style in installing and configuring your system to use vLLM with an Intel GPU.
Environment
GPU
Necessary: An Intel Xe (Arc)/Xe2 (Battlemage) capable GPU.
This environment configuration is pretty much non-negotiable. I assume if you're reading this article, you already have some Intel hardware you want to try with vLLM. This means your GPU could be either of the following:
- Arc 140V (Lunar Lake Battlemage)
- Arc 140T (Arrow Lake)
- Arc B570/B580 (Desktop Battlemage)
- Arc A750/A770 (Desktop Alchemist)
- Arc Pro B50 (Workstation Battlemage)
VRAM/RAM
Necessary: 16 GB VRAM or more (32 GB total RAM if Lunar Lake)
For the amount of RAM you will need, 32 GB is the minimum amount. The Arc 140V already uses about 16 GB of this pool for its VRAM. If you have 16 GB, this doesn't leave a lot for the GPU to work with (8 GB) and you will not be able to run models not much larger than 2B-3B in size as vLLM needs a lot of VRAM for KV cache.
For a 4B model such as Qwen3-4B-Thinking-2507, at FP16, the model needs around 8 GB of memory. Now add in KV cache requirement and a 8-10K context, we will certainly need the 16 GB of memory!
Operating System
Necessary: Ubuntu 24.04.3 LTS
Another non-negotiable here is that you'll need Ubuntu 24.04.3 LTS. This comes with the 6.14 kernel and will be able to support the Intel dGPU client drivers for Xe2 Battlemage.
I DO NOT know if this would even work for 25.04 or 25.10. Just stick with 24.04.3 LTS!
Ensure you have all the dependencies installed:
sudo apt update
sudo apt dist-upgrade -y
sudo apt install build-essential \
	make \
	cmake \
	git \
	git-lfs \
	curl \
	xz-utils \
	libbz2-dev \
	libncurses-dev \
	libreadline-dev \
	libsqlite3-dev \
	libssl-dev \
	xz-utils \
	tk-dev \
	libffi-dev \
	liblzma-dev \
	libcurl4-openssl-dev \
	zlib1g-dev \
	ninja-build \
	pkg-config \
	python3-dev \
	python3-venv \
	libnuma-dev \
	libze1 \
	libze-dev -y
IMPORTANT: libze1 and libze-dev are critical for oneCCL and Level Zero initialization for vLLM when using tensor-parallel-size > 1 (more than 1 GPU)
Python
Necessary: Python 3.12
I had a lot of trouble with this. It took me a while to figure out that the XPU capabilities can only be used with Python 3.12. So ensure you have this installed. Use pyenv to downgrade and use Python 3.12 if you need to.
curl https://pyenv.run | bashThen add the following to .bashrc:
# Load pyenv automatically by appending
# the following to
# ~/.bash_profile if it exists, otherwise ~/.profile (for login shells)
# and ~/.bashrc (for interactive shells) :

export PYENV_ROOT="$HOME/.pyenv"
[[ -d $PYENV_ROOT/bin ]] && export PATH="$PYENV_ROOT/bin:$PATH"
eval "$(pyenv init - bash)"

# Restart your shell for the changes to take effect.

# Load pyenv-virtualenv automatically by adding
# the following to ~/.bashrc:

eval "$(pyenv virtualenv-init -)"
Then install Python 3.12 and then choose 3.12 to be the default.
pyenv install 3.12.3 && pyenv global 3.12.3

# Install Python 3.12 venv
sudo apt install python3.12-venv -y
Preparation
Drivers
Reference from Intel themselves: https://dgpu-docs.intel.com/driver/client/overview.html
This is step is mandatory if we are on Ubuntu 24.04.3 LTS. The distribution itself doesn't automatically have the Xe2 Battlemage GPU drivers for Lunar Lake. So we'll need that. First add the necessary PPAs.
PPA
sudo apt update
sudo apt install -y software-properties-common
sudo add-apt-repository -y ppa:kobuk-team/intel-graphics
sudo apt update
Compute Stack Drivers
sudo apt install -y libze-intel-gpu1 libze1 intel-opencl-icd clinfo intel-gscAfter installing the compute stack drivers, you must add your user to the render group:
sudo gpasswd -a ${USER} render
newgrp render
Verify Drivers Installed
An easy way to verify if the drivers are installed correctly is to run the clinfo command and see what the output is:
clinfo | grep "Device Name"
ls -la /dev/dri/renderD*
groups | grep render
I just run all 3 commands in one go. If all is well, you will see something like this
Device Name                                   Intel(R) Arc(TM) Graphics
  Device Name                                 Intel(R) Arc(TM) Graphics
  Device Name                                 Intel(R) Arc(TM) Graphics
  Device Name                                 Intel(R) Arc(TM) Graphics
crw-rw----+ 1 root render 226, 128 Dec 26 14:28 /dev/dri/renderD128
rngo adm cdrom sudo dip plugdev users lpadmin docker render
If not, then try to reinstall. I'll keep this post updated with troubleshooting instructions. I did. not run into any issues, so I don't have much to say here.
After drivers are installed, it's usually good to just do another system update and reboot:
sudo apt update && sudo apt dist-upgrade -y && sudo rebootoneAPI Base Toolkit
Not sure if absolutely necessary, but good to have it installed. Follow the Linux instructions here to setup the APT repository:
Then just do:
sudo apt install intel-oneapi-base-toolkitRestart your computer.
Virtual Environment
Okay now let's get ready to get vLLM working with the Intel XPU backend. This was qutie challenging to get working -- I chose not to go with the Docker route. I am still not very familiar with Docker - and yes we're almost at 2026!
First, let's create a folder within our file system so we have a clean workspace. It will contain the virtual environment and vLLM source code. If things go wrong, we can just rm -rf this folder and can just start over again.
For example I'll create the folder vllm-xpu under my $HOME directory:
mkdir -p $HOME/vllm-xpuThen we can create a Python virtual environment under the vllm-xpu directory:
cd $HOME/vllm-xpu

python3.12 -m venv .venv
Activate the virtual environment and upgrade pip.
source $HOME/vllm-xpu/.venv/bin/activate
pip install -U pip
Torch for XPU
Make sure you're in your virtual environment. Install torch for Intel XPU:
pip install torch torchvision torchaudio --index-url https://download.pytorch.org/whl/xpu
Test. When it is done, you can run this command to test to see if torch can recognize xpu as an available device:
python -c "import torch; print(torch.__version__); print(torch.xpu.is_available())"
This is good output if all is well:
torch: 2.9.0+xpu
xpu available: True
Clone vLLM and Build for XPU Backend
Now clone vllm and install the requirements:
git clone https://github.com/vllm-project/vllm.git
cd vllm

pip install -U pip setuptools wheel
pip install -v -r requirements/xpu.txt
Build vllm with the xpu as the backend. IMPORTANT! You MUST set VLLM_TARGET_DEVICE=xpu.
VLLM_TARGET_DEVICE=xpu python setup.py installxpu-run script
You'll need to also specify vllm to look for the correct torch libraries for xpu with the correct value for LD_LIBRARY_PATH. Use this script that I have xpu-run and put it in your PATH variable so you can run it any time:
#!/usr/bin/env bash

set -euo pipefail

VENV="$HOME/models/vllm-xpu/.venv"

# Activate venv
source "$VENV/bin/activate"

# Remove oneAPI environment variables that commonly inject runtime libs
unset ONEAPI_ROOT TBBROOT DPCPPROOT IOMP5ROOT

# Strip /opt/intel/oneapi entries from LD_LIBRARY_PATH (if present)
if [[ -n "${LD_LIBRARY_PATH:-}" ]]; then
  LD_LIBRARY_PATH="$(echo "$LD_LIBRARY_PATH" | tr ':' '\n' | grep -v '^/opt/intel/oneapi' | paste -sd ':' -)"
  export LD_LIBRARY_PATH
fi

# Prepend venv + torch runtime libs so SYCL/UR come from the wheel/venv
PY_SITE="$(python -c 'import site; print(site.getsitepackages()[0])')"
export LD_LIBRARY_PATH="$VENV/lib:$PY_SITE/torch/lib${LD_LIBRARY_PATH:+:$LD_LIBRARY_PATH}"

exec "$@"
For example, I will save it to my $HOME/bin directory:
mkdir -p $HOME/bin

echo "export PATH=$HOME/bin:$PATH" >> $HOME/.bashrc

source ~/.bashrc

chmod +x $HOME/bin/xpu-run
Now whenever you want to run something related to vllm, you'll have to pass it through xpu-run first:
xpu-run vllm ...Test vLLM Installation
Test your installation:
python -c "import vllm; print('vLLM import OK')"
xpu-run vllm --help | head
Good output:
vLLM import OK
[W1226 17:07:52.037641637 OperatorEntry.cpp:218] Warning: Warning only once for all operators,  other operators may also be overridden.
  Overriding a previously registered kernel for the same operator and the same dispatch key
  operator: aten::geometric_(Tensor(a!) self, float p, *, Generator? generator=None) -> Tensor(a!)
    registered at /pytorch/build/aten/src/ATen/RegisterSchema.cpp:6
  dispatch key: XPU
  previous kernel: registered at /pytorch/aten/src/ATen/VmapModeRegistrations.cpp:37
       new kernel: registered at /root/workspace/frameworks.ai.pytorch.ipex-gpu/build/Release/csrc/gpu/csrc/gpu/xpu/ATen/RegisterXPU_0.cpp:172 (function operator())
WARNING 12-26 17:07:53 [_logger.py:68] Triton is installed, but `triton.backends` could not be imported. Disabling Triton.
INFO 12-26 17:07:53 [importing.py:68] Triton not installed or not compatible; certain GPU-related functions will not be available.
usage: vllm [-h] [-v] {chat,complete,serve,bench,collect-env,run-batch} ...

vLLM CLI

positional arguments:
  {chat,complete,serve,bench,collect-env,run-batch}
    chat                Generate chat completions via the running API server.
    complete            Generate text completions based on the given prompt
If you have gotten this far, then hooray! 🎉
Running a Model
It is time to run our first model. With about 16 GB VRAM, we are limited to models that are most likely 7B and less. One of my favorite models to run in this class of hardware is Qwen3-4B-Thinking-2507. For 4 billion parameters, it punches above its weight. The model supports reasoning and tool-calling, making it really useful as a front-end orchestration model for doing things like interfacing with MCP server (tools) and other models.
In this section, I'll demonstrate how to serve the model from the Cubi NUC and have the model be able to chat and perform tool calls.
Download the Qwen3-4B-Thinking-2507 model from the unsloth repository:
mkdir -p $HOME/models
git clone https://huggingface.co/unsloth/Qwen3-4B-Thinking-2507
Now let's build up the command to serve the model. The important argument to provide here is the -cc.mode=0 which specifies to not use torch.compile. If this is not turned off, then vllm will attempt to use torch.compile with triton. This does not work with xpu right now.
You may also notice that our context length is only 10K here. That's intentional. Our little Cubi NUC doesn't have enough VRAM to support a higher context length with a model this large. For my purposes, 10K context is more than enough as I am using this device as an orchestrator.
xpu-run vllm serve $HOME/models/Qwen3-4B-Thinking-2507 \
	-cc.mode=0 \
	--host 0.0.0.0 \
	--port 8000 \
	--max-model-len 10240 \
	--served-model-name Qwen3-4B-Thinking-2507 \
	--tensor-parallel-size 1 \
	--tool-call-parser hermes \
	--enable-auto-tool-choice \
	--reasoning-parser qwen3
bash script
Let's build a bash script to run this conveniently. Create run-qwen3-4b-thinking.sh:
vim run-qwen3-4b-thinking.sh
Copy this into the script:
#!/bin/bash

PORT=$1
VLLM_PATH=$HOME/models/vllm-xpu/.venv/bin/vllm

xpu-run "$VLLM_PATH" vllm serve $HOME/models/Qwen3-4B-Thinking-2507 \
	-cc.mode=0 \
	--host 0.0.0.0 \
	--port $PORT \
	--max-model-len 10240 \
	--served-model-name Qwen3-4B-Thinking-2507 \
	--tensor-parallel-size 1 \
	--tool-call-parser hermes \
	--enable-auto-tool-choice \
	--reasoning-parser qwen3
Make this script executable:
chmod +x run-qwen3-4b-thinking.sh
Now try running on port 8000:
./run-qwen3-4b-thinking.sh 8000
It works if you see this!
(APIServer pid=12267) INFO:     Started server process [12267]
(APIServer pid=12267) INFO:     Waiting for application startup.
(APIServer pid=12267) INFO:     Application startup complete.
Benchmarks
Now, how fast can we go with a 4B model? To benchmark, I use the Jan.ai client.
TL;DR here are the results:
| Engine | tokens/s |
| vLLM for xpu | 11.33 🏆 |
| llama.cpp for Vulkan | 6.10 |
vLLM
Let's ask a question:
Is it possible for a US Revolutionary War soldier or a child of one to have lived to see the 1900s? Consider that grand-children and onwards do not count.The model this a thinker. A majority of tokens generated were reasoning tokens.
Partial raw Jan.ai output shows 3795 tokens generated to answer this at a speed of 11.3 tokens/s.
  "tokenSpeed": {
    "lastTimestamp": 1766841946319,
    "message": "01KDG03B9K4PPSEY2XV50ZN9DH",
    "tokenCount": 3795,
    "tokenSpeed": 11.330116913670182
  }
To be fair, it's a tricky question for a smaller model. Not going to post the answer here. You can try. :)
Raw vLLM server logs show things were going well:
(APIServer pid=12605) INFO 12-27 05:30:16 [loggers.py:257] Engine 000: Avg prompt throughput: 0.0 tokens/s, Avg generation throughput: 11.1 tokens/s, Running: 1 reqs, Waiting: 0 reqs, GPU KV cache usage: 12.3%, Prefix cache hit rate: 0.0%
(APIServer pid=12605) INFO 12-27 05:30:26 [loggers.py:257] Engine 000: Avg prompt throughput: 0.0 tokens/s, Avg generation throughput: 11.0 tokens/s, Running: 1 reqs, Waiting: 0 reqs, GPU KV cache usage: 12.8%, Prefix cache hit rate: 0.0%
(APIServer pid=12605) INFO 12-27 05:30:36 [loggers.py:257] Engine 000: Avg prompt throughput: 0.0 tokens/s, Avg generation throughput: 11.1 tokens/s, Running: 1 reqs, Waiting: 0 reqs, GPU KV cache usage: 13.2%, Prefix cache hit rate: 0.0%
(APIServer pid=12605) INFO 12-27 05:30:46 [loggers.py:257] Engine 000: Avg prompt throughput: 0.0 tokens/s, Avg generation throughput: 11.1 tokens/s, Running: 1 reqs, Waiting: 0 reqs, GPU KV cache usage: 13.5%, Prefix cache hit rate: 0.0%
(APIServer pid=12605) INFO 12-27 05:30:56 [loggers.py:257] Engine 000: Avg prompt throughput: 0.0 tokens/s, Avg generation throughput: 11.1 tokens/s, Running: 1 reqs, Waiting: 0 reqs, GPU KV cache usage: 13.9%, Prefix cache hit rate: 0.0%
(APIServer pid=12605) INFO 12-27 05:31:06 [loggers.py:257] Engine 000: Avg prompt throughput: 0.0 tokens/s, Avg generation throughput: 11.0 tokens/s, Running: 1 reqs, Waiting: 0 reqs, GPU KV cache usage: 14.4%, Prefix cache hit rate: 0.0%
(APIServer pid=12605) INFO 12-27 05:31:16 [loggers.py:257] Engine 000: Avg prompt throughput: 0.0 tokens/s, Avg generation throughput: 11.1 tokens/s, Running: 1 reqs, Waiting: 0 reqs, GPU KV cache usage: 14.6%, Prefix cache hit rate: 0.0%
llama.cpp
What about llama.cpp? How fast can we go? First we have to convert the safetensors to GGUF. We will not quantize so running the convert_hf_to_gguf.py script is enough.
python convert_hf_to_gguf.py --outfile $HOME/models/Qwen3-4B-Thinking-2507.gguf $HOME/models/Qwen3-4B-Thinking-2507Now run:
$HOME/bin/llama.cpp/bin/llama-server \
        -m $HOME/models/Qwen3-4B-Thinking-2507.gguf \
        -a Qwen3-4B-Thinking-2507-GGUF \
        -ngl 99 \
        -c 10240  \
        -fa on \
        --jinja \
        --host 0.0.0.0 \
        --port 8000
WIth llama.cpp running at the full quantization of the model and with the same prompt we achieve about 6 tokens/s.
Here are the Jan.ai results:
  "tokenSpeed": {
    "lastTimestamp": 1766873865493,
    "message": "01KDGYQ0NGECK6BQ059Y5PYN5G",
    "tokenCount": 3158,
    "tokenSpeed": 6.102038134839971
  }
This is about the same number of tokens generated from our previous test. From the eye test, this is noticeably slower than with vLLM. In addition to slower inferencing, llama.cpp cannot handle a new request concurrently. The request must be queued and won't be served until the current request has completed.
Scaling Up to (2) Arc B580s
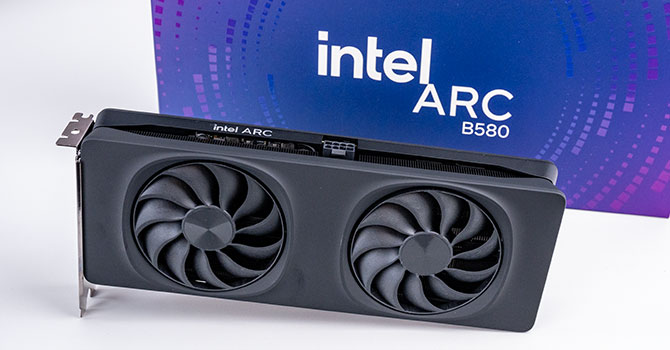
Now, let's take this approach and go up from an Arc 140V to 2 Intel Arc B580 GPUs for a total of 24 GB VRAM. Each card is about $250 new. For 2, that's $500. This is a very cost effective way to get 24 GB VRAM when before, we were limited to a RTX 3090 or RTX 4090 for $1000-$2000. Can it perform well?
It can!
The test system is a desktop I built with the following specs:
- AMD Ryzen 9 9900X
- 64 GB DDR5-5600 RAM
- 2x Intel Arc B580 GPUs
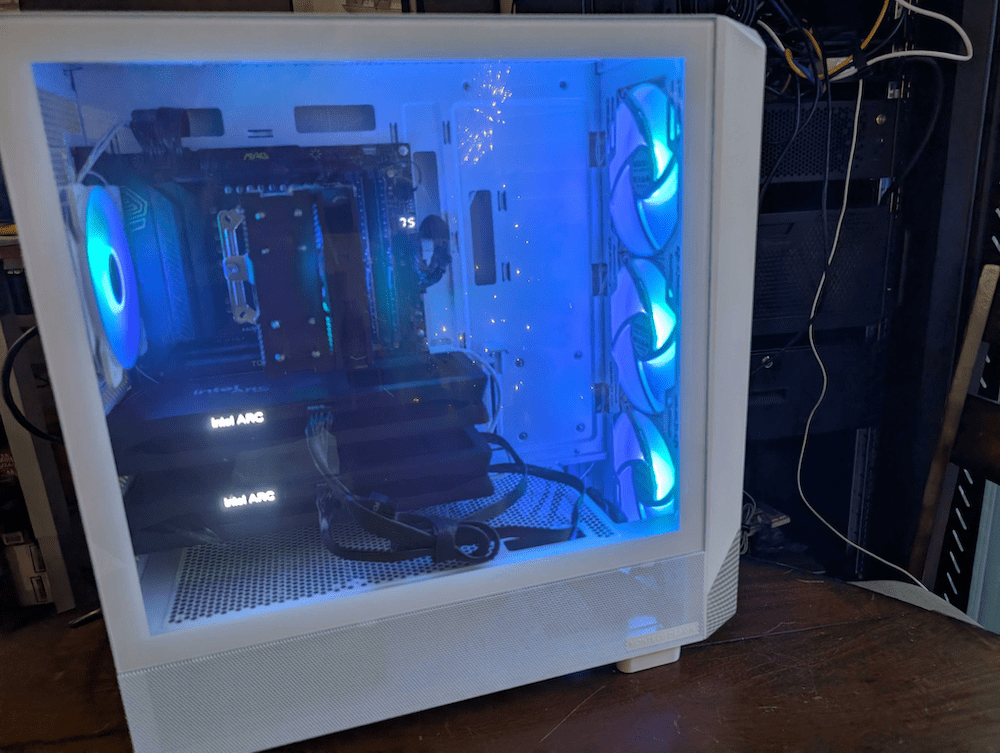
Using gpt-oss-20b at full context, 2 Arc B580s can generate about 83.5 tokens/s with the same prompt as earlier. With llama.cpp using the Vulkan backend, one would assume that there's some proportional scaling as earlier. Surprise! It is not! In fact, in this situation, llama.cpp version can only do about 15 tokens/s. It seems like the inference engine isn't really utilizing the hardware effectively.
| Inference Engine | tokens/s |
| vllm with xpu | 83.5 tk/s 🏆 |
| llama.cpp with vulkan | 15.0 tk/s |
What else can you do?
If we scale the GPUs to 2 Intel Arc B580 with 12 GB VRAM each bringing it to a total of 24 GB VRAM, we can run gpt-oss-20b with full context. Token generation can easily go up to 83 tk/s. That is very fast and can unlock a lot of interesting scenarios like vibe coding, Here are 2 examples:
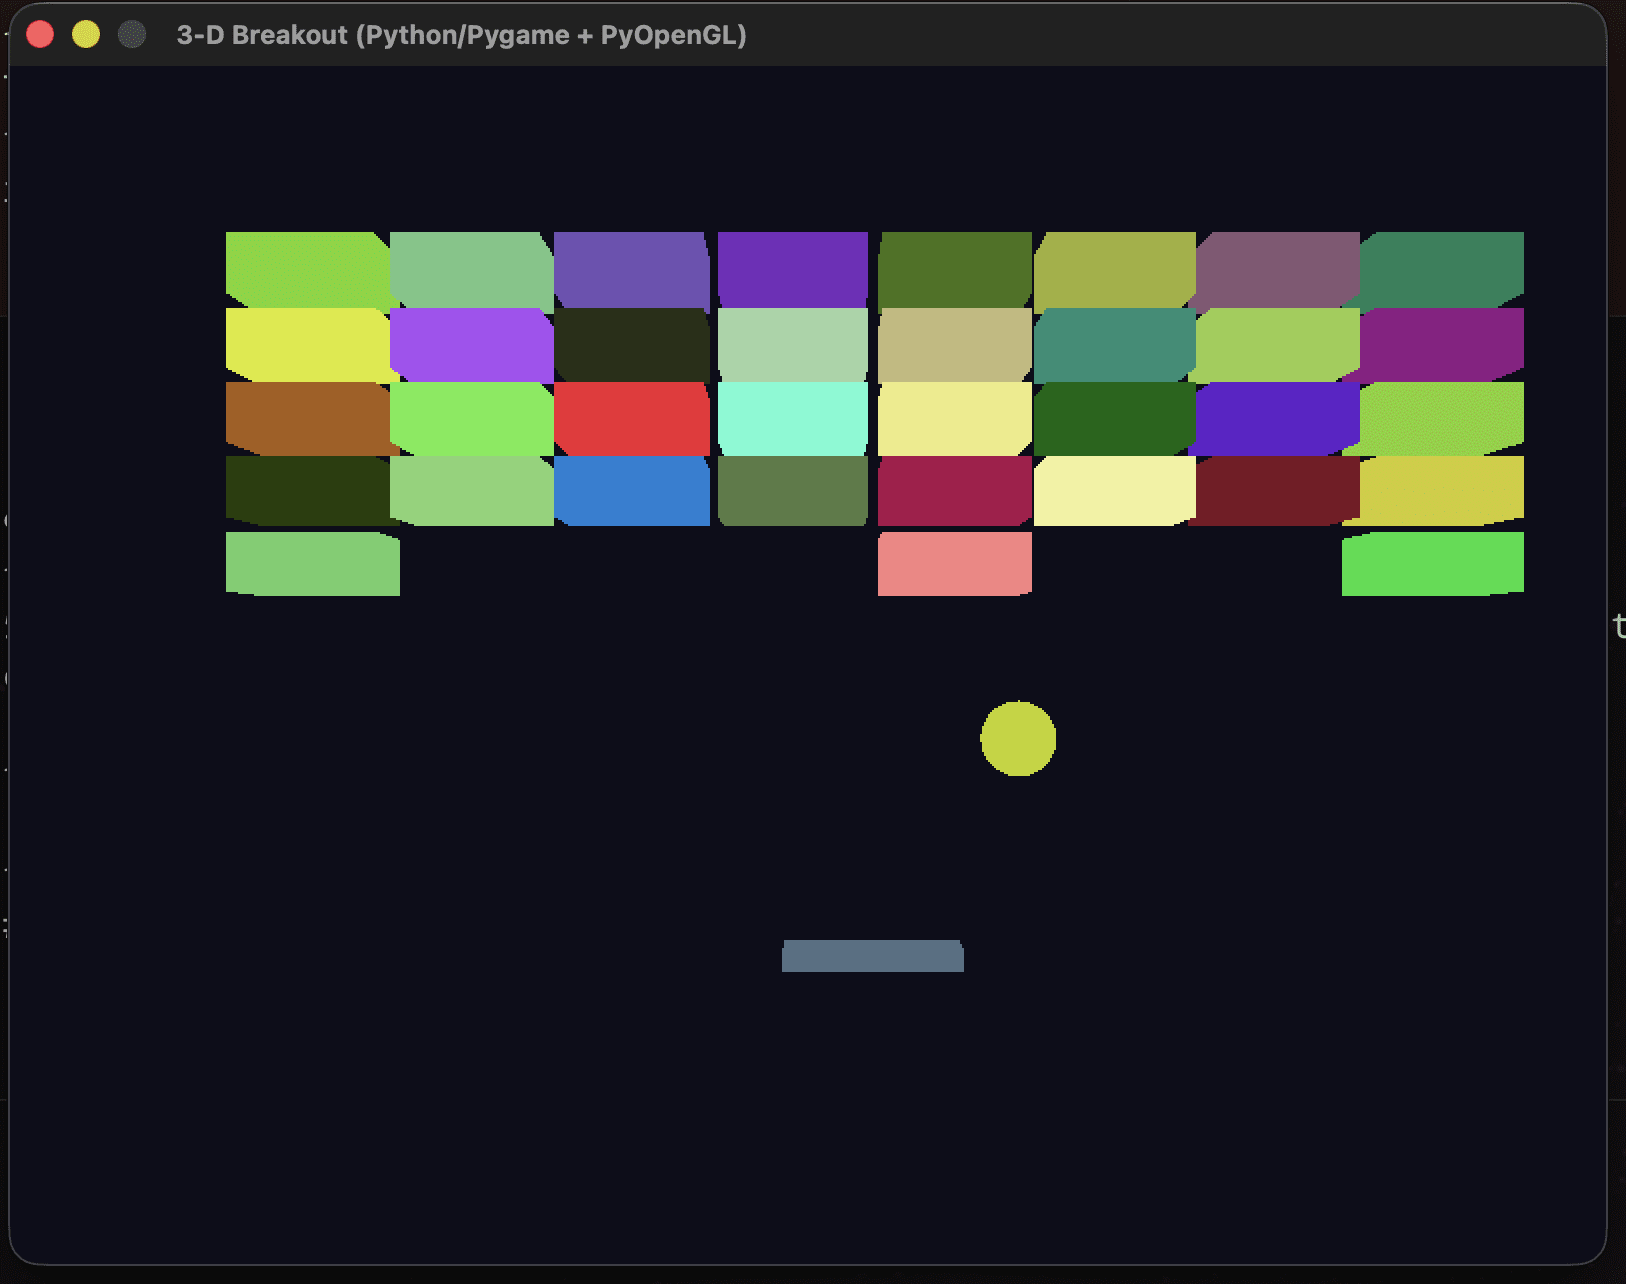
Browser Based OS
Inspired by the "browser based operating system" test performed by YouTuber BIjan Bowen. Task is to prompt the model to generate an operating system that can be run within a browser with a few utilities.

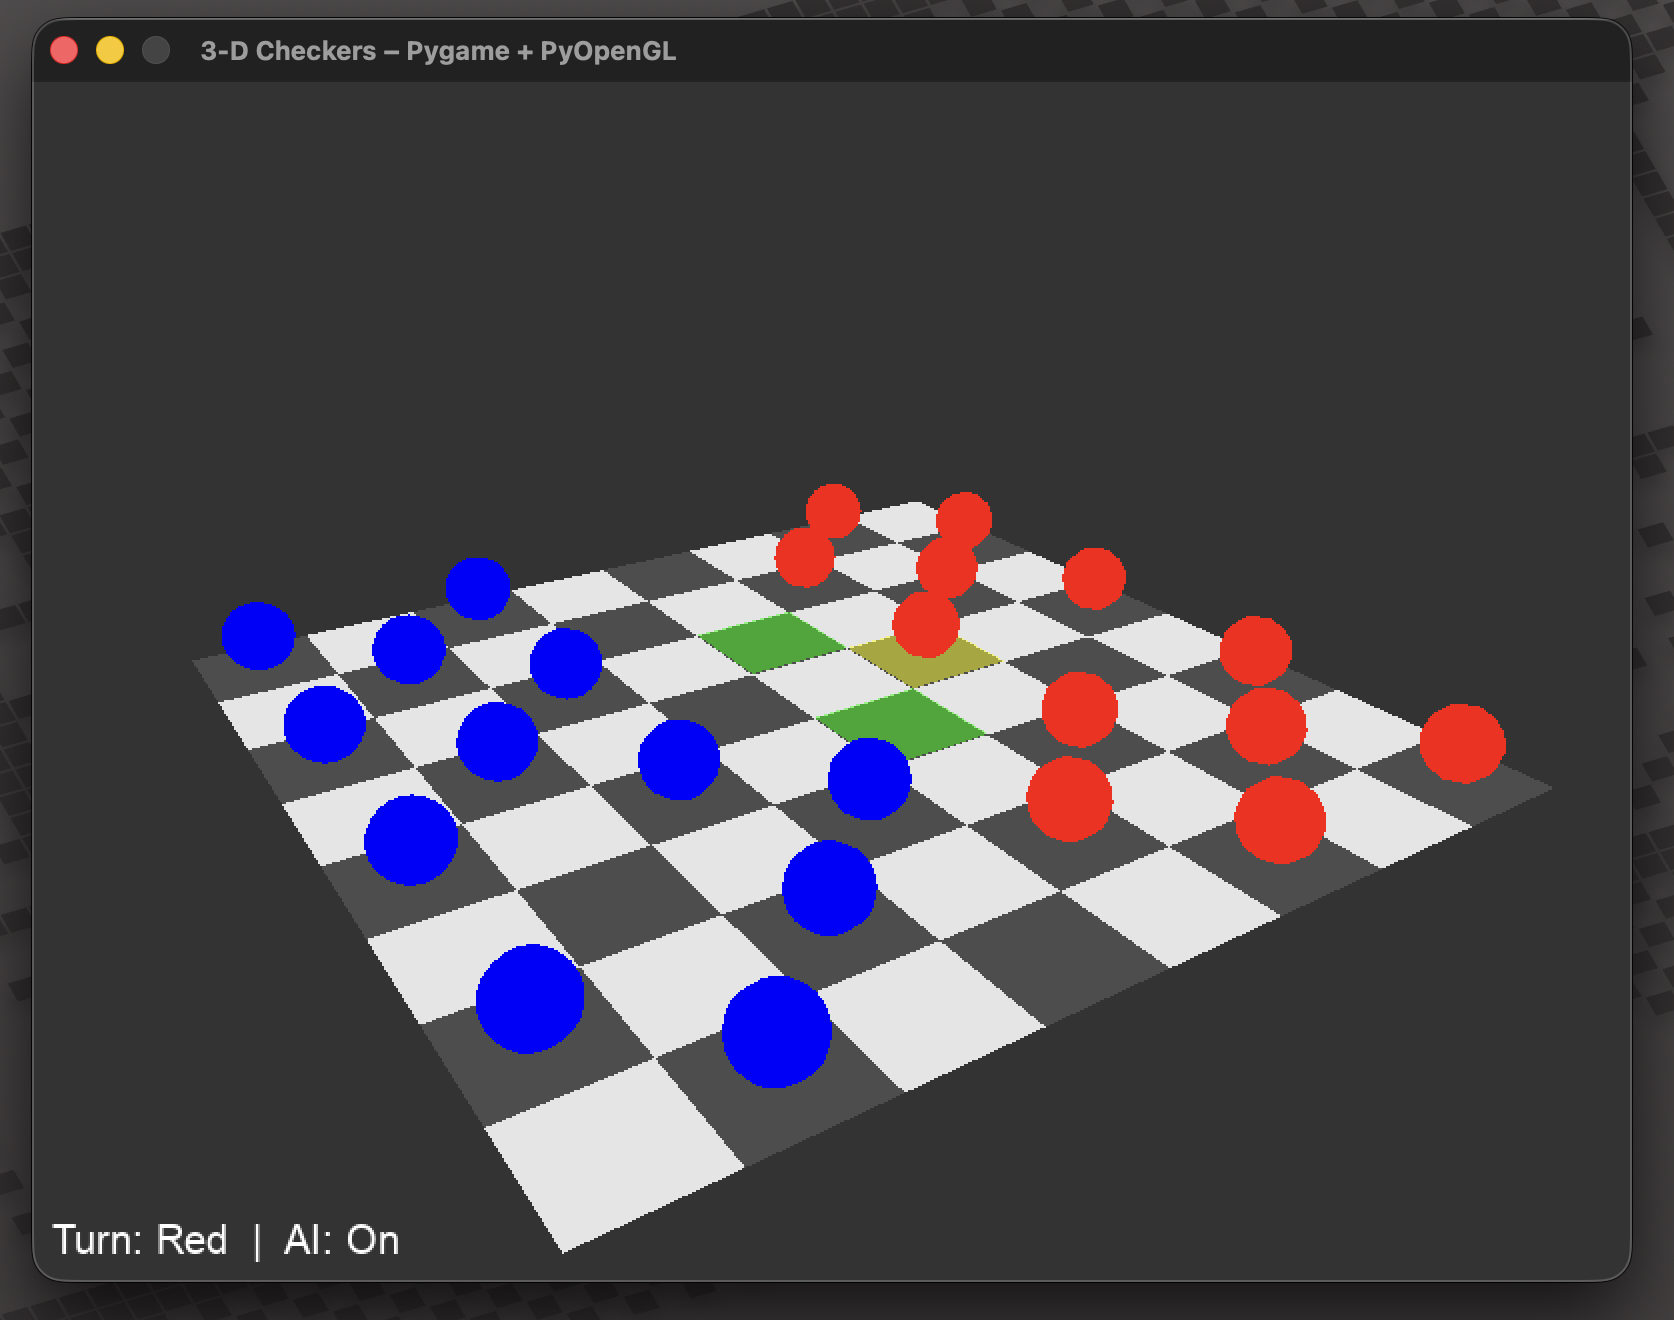
3D Checkers
3D rendered checkers game with option to play with another player, or an AI.
Conclusion
Is vLLM on Intel Arc for you? Yes, if you are chasing performance! This article is a live post to be served as documentation, so check back for new sections from time to time. I'll be indicating at the top when the post was last updated after the original date published.
Troubleshooting
The troubleshooting section... Hopefully you don't make it here. If you do intend to run with multiple Arc GPUs, then expect to have trouble. 😅
TorchDynamo Crashes
You may get an error:
UnboundLocalError: cannot access local variable 'tracer_output' where it is not associated with a valueMost likely you are running an old version of torch. You will need at least 2.9.1. Here's how to ensure you update correctly:
pip install -U --index-url https://download.pytorch.org/whl/xpu "torch==2.9.1+xpu"Then check to confirm:
python -c "import torch; print(torch.__version__)"TritonMissing / Conflicting Triton versions
You'll most likely run into this if you try to run with multiple GPUs tensor-parallel-size > 1.
Errors will look something like this:
torch._inductor.exc.TritonMissing: Cannot find a working triton installation.Or this:
ImportError: cannot import name 'intel' from 'triton._C.libtriton' .../libtriton.soPoint is that triton is broken for xpu. You'll need to remove the current version, and reinstall with the correct version. For torch-2.9.1+xpu, you will need python-triton-xpu==3.5.0:
pip uninstall -y triton pytorch-triton-xpu
pip install --force-reinstall --index-url https://download.pytorch.org/whl/xpu "pytorch-triton-xpu==3.5.0"

# remove cached files
rm -rf ~/.triton/cache
Verify if the reinstall worked. You should get an `OK'.
xpu-run python -c "import triton; from triton._C.libtriton import intel; print('OK', triton.__version__, triton.__file__)"